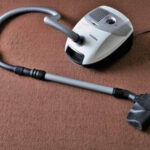
A shop vac works pretty much like regular household vacuums, but it’s way more powerful. What’s more, a shop vacuum furnishes you with really great water-lifting capabilities.
With a decent shop vac that has a large-enough tank, you can drain your Cal King waterbed for a move in a few hours. You can also drain a flooded basement or even a pool if it doesn’t contain too much water.
What Is a Shop Vac?
A shop vac is an extremely powerful piece of cleaning equipment that many people use to tidy up garages, blowing out leaves, unblocking clogged sinks and toilets, cleaning carpets, getting water out of carpets, and draining flooded floors.
While this vacuum type shares a slew of similarities with regular vacuum cleaners, it’s also different in some ways. For example, you can’t use a conventional vacuum to clean up a basement flood.
And if you try to pick up sawdust in the woodworking shop using a typical vacuum, you’ll notice the machine chokes on the debris and eventually stops working.
But the most distinguishing aspect is that shop vacs (some) are extremely powerful and can lift up water and other wet messes without a problem if you set them up correctly. More on how to do the setup later.
Summary for how to Drain a Waterbed with a Shop Vacuum.
Begin by removing the vacuum’s dry filter and emptying any dry messes from the canister. You will not need the filter because the focus is the wet function of the vacuum. Further, dirt inside the canister only eats up the much needed space for water that you drain from the waterbed. Next, attach the hose and move the vacuum to the waterbed. Remove the beddings and everything from the waterbed then locate the plug.
Remove air from the waterbed first, then connect the hose to it, plug in the vacuum and let the vacuum such out as much water as it can. Monitor the vacuum and empty the canister every time it fills up.
Step-by-Step Guide for Draining a Waterbed With a Shop Vac
There’s at least 2 ways of getting water out of a waterbed without a pump. You can use a garden hose or a shop vacuum.
A waterbed often arrives with a waterbed pump, but what if you can’t find yours? You can use a hose/gravity or a shop vac instead.
But what if the waterbed is in the basement? In this case, you can’t use gravity to siphon water out of the waterbed. But you can sure use your garage shop vacuum to drain a basement waterbed.
Step #1: Remove the Vac’s Dry Filter
A wet/dry shop vac picks up dry debris such as sawdust and small pieces of wood and metal with ease. A paper filter removes particles from the air as it passes, and the dry messes go to the canister.
So, lift off the top part of the shop vac and pop out the dry filter inside. You can replace the dry filter with a wet filter, which is a foam filter that filters particles out of water as it passes.
Since you’re not interested in any kind of filtration when draining a waterbed with a shop vac, you don’t need to fit in any filter. And there won’t be any problem if the setup is filter-less.
Empty the dry messes, fine dust, and small rocks stored in the canister. You can empty the gross contents in the tank into a plastic bag, the kind contractors use. Why dump out the dry messes? To create room for the water pulled out of the waterbed.
Step #2: Attach the Hose
Hook the hose onto the vacuum.
Step #3: Move the Shop Vacuum to the Waterbed
Now that the shop vac is empty and properly set up, hauling it to the basement or wherever the waterbed is located should be easy.
Step #4: Remove Everything from the Waterbed
Bedsheets, pillows, blankets, remove everything on the bed. Also, pull back the cover so you can easily access the drain plug.
Step #5: Get Excess Air Out of the Waterbed
Here’s an air removal from waterbed video to guide you as you execute this process.
Locate the fill-and-drain valve. This crucial valve is usually found around the foot of the bed. Unscrew the cap on this valve so air can escape easily. Screw an air extractor onto the valve.
Get anything tubelike and start rolling it on the bed from the headboard side toward the valve side.
Once you get close enough, and you can see air bubbles through the transparent part of the valve, pump the air extractor to release the air. Repeat this 3-5 times and only stop when there’s no more sloshing inside the waterbed.
Why de-air the waterbed? Because doing this slows down the water removal process. Besides, you’ll end up with a quiet bed, no more sloshing while sleeping.
Finally, remove the extractor and quickly replace the cap to prevent air from getting back in.
Step #6: Plug the Shop Vacuum into a GFCI Outlet
I assume you’re using a cored shop vac and not a battery-powered unit. If you own an older home, one built before 1987, chances are that it lacks a GFCI outlet in the kitchen.
And if the home is even older than that (built before 1975), the odds are it doesn’t have any GFCI outlet in the bathroom.
The National Electrical Code requires this modern outlet type to be installed in places that are likely to get wet or damp. Places such as utility sinks, wet bar sinks, garage, outdoor areas, unfinished basements, and crawl spaces.
Do you own a newer home? you shouldn’t have any problem finding a safe outlet into which to plug your wet and dry shop vacuum. What if you have no GFCI outlet? Check the manual to learn if the wet/dry vac has double insulation.
If the shop vac is double-insulated, you can safely plug it into a standard outlet. This resource explains the difference between standard outlets and GFCI outlets.
Step #7: Connect the Hose to the Waterbed
To connect the hose to the fill-and-drain valve, you need a connector or adapter. Once you connect the vacuum, crank it up and start draining the waterbed.
Place heavy objects such as books around the valve to lower the area so that water can shift toward the valve.
When the tank fills up, you’ll notice a change in the motor’s noise. When this happens, switch off the vacuum, empty the canister, and repeat the process.
Once a decent amount of water’s been pulled out (about 75-80%), fold the mattress over toward the valve to force water to flow in that direction. Note: rolling the mattress over is a tough job, one that requires a really strong person.
After removing about 90% of the water, the mattress will still be quite heavy, but you can carry it outside to drain out any remaining water.
Consider this…
How Many Times Will You Empty the Tank?
Some of the larger wet/dry vacs have 16-gallon tanks. With a large-capacity vacuum, you won’t need to empty the tank that many times.
Big problem: One gallon of water weighs about 8.3 pounds. So, a 16-gallon canister full of water weighs nearly 130 pounds/over 50 kgs!
Very few people can lift such a heavy canister for emptying. So you’re stuck with 5-gallon tanks, which means draining a 200 gallon waterbed requires roughly 40 trips to dump out the water.
For this reason, draining a waterbed with a shop vac isn’t efficient. Besides that, it can be extremely exacting.
Step #8: Clean the vacuum
Finally, clean the vacuum, dry it off completely, and store it.
How to Use a Shop Vac to Drain a Flooded Floor
- Turn the shop vac on.
- Grab the vacuum’s flat, wide nozzle and position it on top of the water.
- Keep the nozzle in this position until it lifts up all the water around and under it.
- Once the unit picks up all the water in one section, move to a new section of the floor and repeat the process. Keep going until the machine gets all the water off the floor.
How to Use a Shop Vac to Drain a Pool (Or Large Quantities of Standing Water)
- Attach the hose.
- Plug the vac in and power it up.
- Then, point the hose to the surface of the standing water.
- If there’s lots of water to lift up, you’ll have to empty the canister multiple times before you’re done. Draining a pond with a shop vac isn’t a very smart way of doing it, though.
The cleanup needs as much time as the tank’s size dictates. If the tank is small, that’ll be a bajillion trips. But do you really want emptying that pool to take forever? Get a vacuum with a larger tank.
But a larger tank weighs more and requires much more muscle power to empty. The weight difference between a 2-gallon canister and a 20-gallon tank is like… night and day.
2 Alternative Ways to Drain a Waterbed
- Use gravity: Connect the hose to the water side (not air vent) with a waterbed connector. Since you’re relying on gravity to drain the waterbed, this strategy works best if the waterbed is on the second floor or higher.
You can run out the hose through a window. If this isn’t possible, you can have the hose drain into a bathtub or sink, but these need to be fast-draining or you’ll flood your home.
Once most of the water gets out and no more flow is happening, roll the waterbed toward the valve to force any remaining water out. As already mentioned, this is a tough job. If you’re a little scrawny, you might need a bit of help.
Here’s 3 useful tips:
Tip #1: Unplug the waterbed’s heater so you won’t endanger your life or damage the bed.
Tip #2: Connect the “water out” end of the hose to an outdoor faucet and let water get in for about 15 seconds. Alternatively, you can use your mouth to suck the air in the hose out. But hose ends aren’t always hygienic, are they?
Then, drop the hose to the ground/grass and water will start flowing out.
Tip #3: Place weights over the bed to hasten the process. You can lie on the bed as the water siphons out. And if you have a partner or kids, ask them to join you in the fun.
- Use a waterbed pump: Waterbeds typically come with a pump to help drain them when moving.
The downside is that pumps sometimes burn out, so you’ll have to keep an eye on it the whole time. And do you really want to spend an entire day watching a pump drain a waterbed? Me neither.
Yes, that’s how you drain a waterbed with a shop vac or without a pump. Please let’s know how the exercise goes for you.