Investing in hardwood floors costs an arm and a leg, but on the other side, you can be confident they will serve you for a lifetime. But the confidence can quickly dwindle with improper care and the wrong cleaning routine. That’s why learning the proper cleaning and care routine should be at the top of your to do list.
How to Clean Hardwood Floors
Newly installed hardwood floors gleam with luster and beauty. This is the glory routine cleaning seeks to maintain for the long-term. But before you get your hands on the procedure, the first step is to understand the kind of finish that your floor features.
Step 1: Determine the Finish
Hardwood floors can either be bare or finished. Bare floors, also known as unfinished do not feature any coating on the top of the wood. As such, they are more delicate to handle as you can find out in our detailed cleaning article here.
Finished hardwood floors feature urethane or polyurethane coatings on the surface or deeply penetrating wax finishes, or wood injected acrylic impregnated finishes.
Besides improving the appearance, these finishes seal the wood against moisture and improve the durability of the floor. You can learn more on this from the American Hardwood Information Center.
Urethanes or polyurethanes are friendly to generic hardwood cleaners. However, if this goes against the guidelines provided by your floor manufacturer, it is important to do what is right.
Wax finishes favor cleaning products that are specifically meant for them. Acrylic impregnated floors can be safe with urethane or other types of wooden floor cleaners depending on the specifics of the finish.
But how do you actually determine the type of your floor finish?
According to knoxheritage.org there are several ways to do this. The first step is to touch the floor with your palm. If you can feel the grain’s texture, there is no doubt your floor is characterized by a finish that penetrates deep into the wood. This is a characteristic that is associated with a combination of wax and natural oil finishes.
To confirm if wax coating on your floor, pour a few drops of water on a hidden part of the floor. Wait for up to 15 minutes and observe whether white droplets form on the spots covered with the droplets. Treat the spots with wax thereafter.
The second step is to do a paint remover test on a hidden part of the floor. Pour a small drop of paint remover on the flow and observe how it reacts. If you see the finish bubbling up, be rest assured that your floor’s coating is made of urethanes or polyurethanes.
Lastly, take a coin and scratch a hidden part of the floor. If the floor flakes out, then it features varnish or shellac coating. Both of these are coating that were popular in the past.
Step 2: Sweeping
Sweeping and vacuuming are the best methods for cleaning wooden floors. But you have to start with one. In our article for best order for cleaning, we explain in details the reasons for sweeping before vacuuming. But briefly, sweeping stirs up dust, which you can clear later through vacuuming.
When it comes to hardwood floors, sweeping helps clear dirt and grit that can cause scratching. It should be done daily or as regularly as possible.
Step 3: Vacuuming
To vacuum hardwood floors, identify a vacuum that is suitable for the task. Vacuums vary significantly in designs and purposes. Some are upright, others wet and dry, just to mention a few. As for functionality, vacuums may be suitable for carpets, garages, concrete floors, pools, artificial turf and so on. You can read more on this information in our buyer guide.
Vacuum your floors to remove all traces of dirt and dust. Begin from the farthest corner of the house and move to the rest of the areas systematically. Vacuum daily to prevent dirt from accumulating and creating a more serious cleaning problem.
Step 4: Cleaning
As mentioned earlier, the type of finish should help determine the actual cleaning procedure and products for your floor. However, the bottom-line for all types of finishes is avoiding water.
Water penetrates deep into the wood and subfloor thereby cause permanent damage gradually. The common aftermaths include warping, cracking and staining.
As for urethane or polyurethanes use products recommended by your floor manufacturer. Alternatively, you can use generic floor cleaning products such as Fabuloso, Bona or Pinesol.
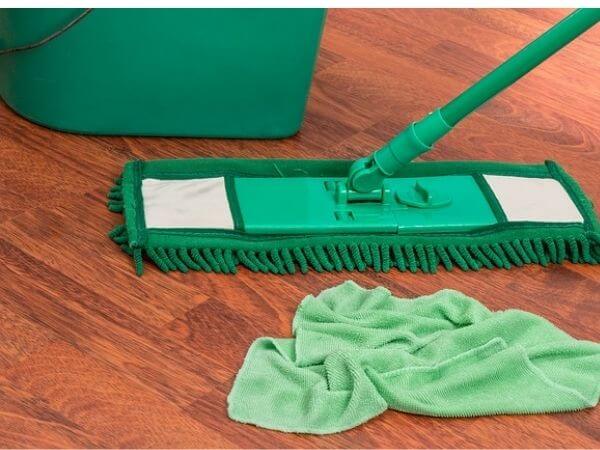
If you mix a product with water, wring the mop completely before mopping so that the floor can dry immediately. Further, do not leave spills unattended, wipe them off immediately with a dry rag or mop.
Another important consideration is to wipe cleaner residue from the floor completely. If left to accumulate, it can dull or ruin the floor in other ways.
Clean wax coated wooden floors with a cleaner that is specifically meant for wax finish. Use a dry microfiber cloth to wipe spills immediately. Sometimes you might notice white spots that form as a result of spilled water. Use mineral spirits to wipe them off with a slightly rough cloth then apply wax on the spot. Wax coated floors might require buffing every now and then.
How to Maintain and Care for Hardwood Floors
A good cleaning routine will ensure that your floors remain in good condition but that’s not all it takes. Georgiaoakfloor.com insist on additional maintenance tips that add on to sustaining the glory and lengthen the durability of your floors.
Minimize dirt: Although hardwood floors require regular cleaning, using moisture is not recommended. Still and all, floor that constantly gets heavy with dirt may need a little help with water sometimes.
As such, the key to minimizing the times that your floor comes into contact with moisture is keeping all sorts of dirt and at bay. Although this is not possible, there some measures that can help remedy the problem.
First of all, keep walk-off mats at all entry points. This is extremely important especially if you have heavy traffic coming into your house. Shoes collect heavy dirt and debris in the outside of house premises. Mats prevent the dirt from ending up on your floor.
It is important to note that dirt particles can have a sandpaper effect on your expensive floor. This can lead to scratches that are sort of permanent.
Secondly, spread area rugs and other coverings in dirt prone areas. Ideally, these are areas you are likely to see liquid and solid spills. A good example is the dinning, kitchen or, children play area. Depending on the fabric, area rugs can be much easier to maintain compared to hardwood floors.
Further, they are a less costly investment and easier to replace.
Recoating: All types of hardwood floor finishes wear out over time. Having this mind, observe your floor depending on the traffic in your house and determine the appropriate time for recoating. This prevents your floor from developing permanent damage.
Allow enough time for the finish to dry: A grave mistake that some people make is to place items in the house before the floor finish completely dries. This is a messy and costly mistake. Besides ruining the floor, it can create the need for unnecessary repairs, and void the warranty.
Use protector pads on your furniture: Heavy furniture can cause scratches on your expensive floor. As such, protector pads come in handy. They are functional, affordable and provide a solution that lasts.
Use the right cleaners on your floor: Hardwood floors and choose and that’s how it is. As a result, it is important to be cautious when choosing floor cleaners. A great tip is to follow advice provided by your installation company.
Avoid walking around the house with high heeled shoes: Pointed high heeled shoes have the potential to cause marks and scratches on your floor. However, the impact also depends on factors such as weight.
Wipe spills immediately: The two major enemies for hardwood floors are water and anything that can cause scratches.
Avoid cleaners meant for other types of floors: Sometimes you might be tempted to use a cleaner that is meant for concrete, laminate or vinyl floors. Avoid such thoughts because your floor might develop a serious problem.
Be careful when damp mopping: Making the floor excessively wet while damp mopping can lead to permanent damage.


