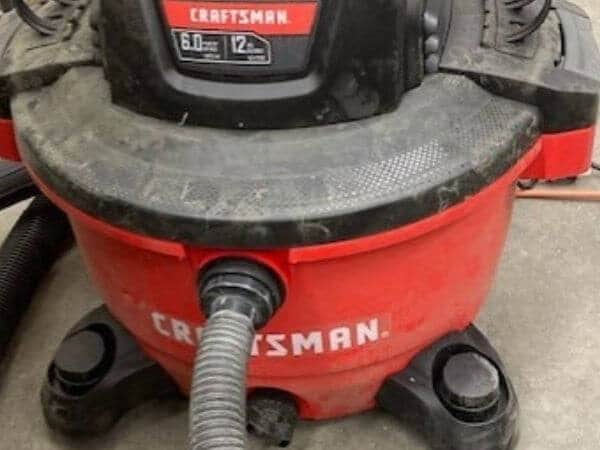
A shop vac is quite different from conventional vacuums. However, when it comes to vacuuming, the basic principles are the same. Ideally, the intention should be to maximize on the cleaning quality of your machine, while ensuring that the machine stays in good condition for as long as possible.
Generally, individual wet and dry vacuums manufacturers provide a model-specific user manual. If you have the manual within your reach, it is better to dig into it for firsthand information.
However, if that is not an option, below are simple steps to correctly put your appliance in to use.
How to Use a Shop Vac
Step 1: Assembling
The first step for using a wet/dry vacuum is ensuring that all the components are assembled properly. A standard shop vacuum has numerous internal components and multiple external attachments.
Depending on your brand, the internal components might come assembled or not. On the other hand, the external attachments are mostly separate.
If the internal components come assembled, your appliance is most likely ready for dry vacuuming. If they are not assembled, follow the manual carefully and put everything in its place.
Step 2: Declutter the Work Area
Before you even begin to operate the appliance, ensure that the work area is clutter free. Vacuuming a cluttered place overcomplicates the process.
Take unnecessary things out of the way, for quality cleaning and to protect your machine. Have in mind that leaving around things that can pull or interfere with the cord while you are cleaning is dangerous.
Step 3: Vacuuming Dry Mess

For you to vacuum dry mess with a wet and dry vacuum, the right accessories have to be in place.
Insert the Cartilage Filter
The most important accessory is the filter. The cartilage filter is the appropriate component for dry vacuuming. As such, if your vacuum has the foam sleeve in place, replace it with the cartilage filter.
Remember that your appliance should not be put to use without a filter. Further, it is important to place the filter correctly. Alternatively, you expose your machine to the risk of developing problems quickly.
If you are not using your vacuum for the first time, inspect the filter to ensure that it is clean. A clean filter improves the performance of your machine. Remove a dirty filter and clean it. Dry it well before placing it back in the machine.
A wet filter can clog with dirt and dust. Firstly, this reduces the efficiency of your vacuum. Secondly, it becomes difficult to clean the filter and the rest of the machine thereafter. Thirdly, some machines develop permanent motor damage.
Filter Bag
Check whether the bag is full if you have a wet and dry vacuum with a filter bag for dry messes. Dispose off a full bag and replace it with a new one. This allows your machine to run smoothly as dirt collects without being released back to other components of the machine.
Canister
Inspect the canister to see whether it has liquid mess. Empty and clean it first before undertaking dry vacuuming task.
Hose
Check the hose to ensure that it is dry. Sometimes you might make the mistake of leaving the hose wet after vacuuming liquids. This creates the right environment for dirty solid materials to get stuck in there. As a result, you end up with clogging issues.
Choose the Appropriate Attachment
Now that your vacuum is all set, it is time to choose the right attachment. Typical wet and dry vacuum attachments include round brushes, squeegee, wands and crevice tool. There are also some attachments that you can buy separately. An example is the sub surface carpet extraction tool.
The choice of your attachment should depend on the surface you intend to clean.
Plug in Your Machine
After you are done preparing the machine, connect the power cord to the receptacle. Remember to check whether the switch is off before plugging. Also, make sure that your hands are not wet.
Step 4: Vacuuming Wet Messes
- To vacuum wet messes, begin by replacing the cartilage filter with the foam sleeve. This is the appropriate accessory for the wet vacuuming mode.
- Remove the dust bag from your vacuum. It is only useful when collecting dry dirt and debris.
- Choose the appropriate attachment and set it in place.
- Plug in the power cord to the power outlet and begin vacuuming.
- Ideally, most wet and dry vacuums shut off automatically when the tank fills up with liquid. Further, the machine also noticeably stops to suction. Turn off the machine if this happens. Also, turn off the power outlet switch and unplug the machine.
- Use the hose to empty the tank.
- Clean the machine one you are done vacuuming and allow all the accessories to dry properly before putting them back in place.
Using a Wet/Dry Machine as a Blower
Shop vacs are powerful and can also function as blowers for your garage and other places. Even so, you have to learn how to use the feature provided for this purposes.
- Firstly, ensure that your vacuum’s tank is empty. Equally, inspect the dust bag to see if there is the need for a replacement. There is also the need to ensure that the hose and other parts of the vacuum are dry, clear and properly in place.
- Transfer the hose from the vacuum port to the blower port and secure it. The blower port is easily to locate. Most machines have it at the back of the tank’s cover.
- Plug in your machine to the receptacle and turn it on.


